Wednesday, September 28, 2011
motor mount thoughts
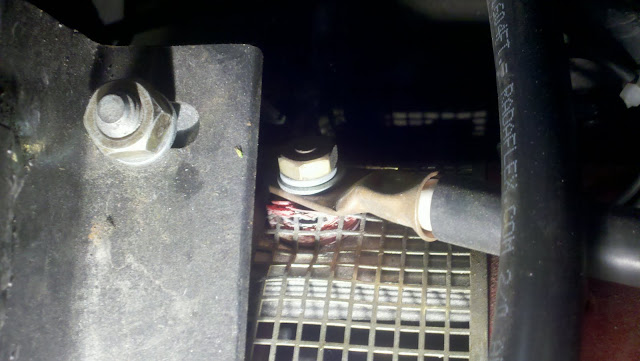
On close inspection, it's clear I need to redesign the rear motor mount. Currently, the rear mount (CE of the motor) is a beefy strap clamped around the end, then connected to the stock upper motor mount location. I don’t like this setup because a portion of the clamp is actually over the inlet screen, which is not well attached to the motor itself. This appears to be what actually damaged the motor. The clamp to screen was solid, but the clamp and screen rotated together on the motor and damaged the posts and connector when everything broke and rotated. I see two options here. Either a) modify/remove the screen so the clamp is directly on the motor or b) replace the clamp with a simple CE bolt on plate that connects to the same mounting point. Either way I’ll add a lower torque bar to reduce motor rotation. This will require welding a tab to the frame, once I get the motor back in I’ll have to tow it to a shop to have that done. I’m sure the torque bar itself will be enough to solve the problem.
Friday, September 23, 2011
pics of motor damage
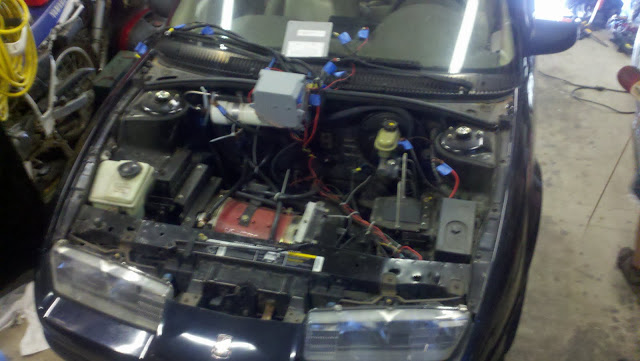
A bit more progress today, I pulled out all the components mounted over the motor. First I made a good wiring diagram, then started disconnecting and labeling everything. It was a shame to pull it all apart, it was wired really cleanly! Anyway, with the tray and components out of the way, I could get a good look at the motor.
In the closeup below, you can see the damage. The closer I look, the better it seems! It looks like it possibly is just that the metal screen rotated and pushed up against the terminals and the plastic connector. It broke the connector out of the case, but the terminals actually look decent, just the plastic insulators got thrashed. It also really shows how far up the motor twisted. It pulled the rubber motor mount clean apart on the right side.
below are a few photo’s showing the ripped apart CV joint (which sprayed grease on everything near it!) and the lower torn trans mount. It also completely separated.
so far so good!
 |
| From 2011-09-23 damage |
 |
| From 2011-09-23 damage |
In the closeup below, you can see the damage. The closer I look, the better it seems! It looks like it possibly is just that the metal screen rotated and pushed up against the terminals and the plastic connector. It broke the connector out of the case, but the terminals actually look decent, just the plastic insulators got thrashed. It also really shows how far up the motor twisted. It pulled the rubber motor mount clean apart on the right side.
 |
| From 2011-09-23 damage |
 |
| From 2011-09-23 damage |
 |
| From 2011-09-23 damage |
 |
| From 2011-09-23 damage |
below are a few photo’s showing the ripped apart CV joint (which sprayed grease on everything near it!) and the lower torn trans mount. It also completely separated.
 |
| From 2011-09-23 damage |
 |
| From 2011-09-23 damage |
so far so good!
Thursday, September 22, 2011
Arriving home!
I had the car transported since it was a non-runner, it was delivered on a huge transporter right to our doorstep! What service.Here’s my girls trying to figure out which one is our new car…
and here they are trying to figure out where to hook the winch line. (yes, the wheels are chocked...)
I was able to pull it up the hill into the garage without problem, prior to it arriving I had installed a 1/2" anchor bolt in the garage floor and bought a hand winch to pull the car up our steep driveway. I had one kid in the driver’s seat covering the brake, and the other in the passenger seat ready to yank up the e-brake on a moments notice! They took their jobs VERY seriously. Alas, there was no drama, it just pulled right up and in.
 |
| From 2011-09-22 delivery |
 |
| From 2011-09-22 delivery |
I was able to pull it up the hill into the garage without problem, prior to it arriving I had installed a 1/2" anchor bolt in the garage floor and bought a hand winch to pull the car up our steep driveway. I had one kid in the driver’s seat covering the brake, and the other in the passenger seat ready to yank up the e-brake on a moments notice! They took their jobs VERY seriously. Alas, there was no drama, it just pulled right up and in.
I fooled around with it for a little while, mostly making a wiring diagram and trying to figure out how everything was wired up. I also pulled the hood off, but that was the extent of my actual ‘work’ tonight. Most of the components have to come out in order to pull the motor (and replace the component shelf that was broken when the motor jacked up) so I want to make sure I’ve got a good complete wiring diagram before moving forward. Here’s a few ‘before’ pics of it nice and snug in the garage.
 |
| From 2011-09-22 delivery |
 |
| From 2011-09-22 delivery |
 |
| From 2011-09-22 delivery |
In the beginning...
I just purchased an electric car! This blog will chronicle the rebuilding of this car, as well as an ongoing report of life with a 100% electric vehicle.
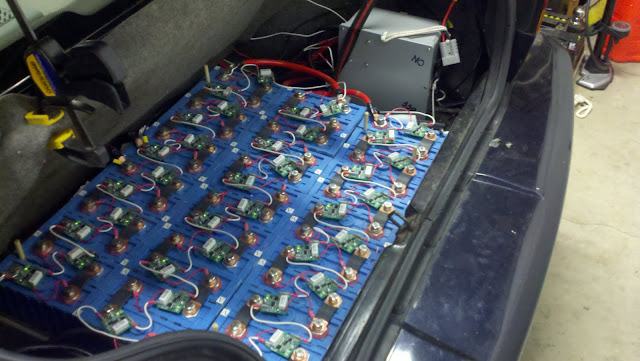
This particular car, a 1995 Saturn SL2 4 door sedan, was converted to electric a few years ago. The initial conversion was done with lead acid batteries, and as far as I can tell was a very quality conversion. It was then sold to another owner who drove it for a while, then swapped the lead batteries for Lithium Ion batteries (LiFePO4). This is a massive improvement, basically a similar chemistry to what is in the Leaf and Tesla. The car then had a serious problem where the motor mounts broke allowing the whole motor/trans to swing up and do some serious damage to the mounting structure as well as the CV joints.
I bought the car in non-working condition with the batteries and all. A solid base for a new project, basically an electric car 'fixer-upper' that should not take too long to get back on the road. It will then be a series of ongoing smaller projects to improve the car once it's back together and being used as my daily driver.
Subscribe to:
Comments (Atom)